Monday, February 29, 2016

Most Used February

I like trying new products, but sometimes it's hard to go out on a limb and buy something new without someone recommending it. I am by no means an expert, but I know what I like and what works for me so I figured I'd share. Who knows? Maybe you'll find a new favorite product based on what I share! :)


I was using the Murad Time Release Acne Cleanser, and I liked it, but I wasn't blown away by the results so when it was time to repurchase I decided to try a drugstore cleanser. I purchased the Olay Total Effects 7 Revitalizing Foaming Cleanser and so far I've been really happy with it. 


I've also been using the Clinique Take the Day Off Makeup Remover to remove my eye makeup. I've got sensitive eyes, so it was important that I find something that didn't irritate my eyes and easily removed my eye makeup. This fits the bill. Warning: don't leave your purple nail polish remover sitting on the counter near the makeup remover. You might accidentally grab the wrong bottle and instantly regret it. Oh, the burn! Luckily I had my eyes closed and I realized after the first swipe across my eyelid and was able to rinse quickly so it didn't do any damage.

Even though this winter hasn't been that cold, my hands have still been dry and cracked. They just hurt, so I decided I needed to use something besides just lotion. I had been looking at L'Occitane products since our Paris trip last October, so I decided to try their One Minute Hand Scrub. When it arrived I was a little concerned because it looked very liquidy. That's why you should read the directions! Turns out you have to use the included spatula to mix before using it.  Once it's mixed I scoop some out and rub my hands together for about a minute before rinsing with warm water. After I rinse and dry my hands, I immediately follow up with Soap & Glory Hand Food. Best. Lotion. Ever. I even have my father-in-law using it! I used to buy it from Sephora, but they stopped carrying it so now I buy it at Ulta. You will love it!


I have never had long, healthy nails. My nails tend to peel and break very easily. I used to get my nails done, but that got expensive so I stopped. Since then my nails have been just awful, so when I got the Perfect Formula Pink Gel Coat as a sample with a Sephora order, I decided to try it. It's supposed to strengthen and harden your nails. Good and good. When used on a regular basis my nails are much healthier and they actually grow! It makes the whites of my nails look whiter and the pinks pinker. It almost looks like I have a french manicure when I use it ~ love it!

I have been trying out different shampoos and conditioners this month because I was participating in a hair trial (I hope to share more about the products I tried soon!), but Matrix So Silver has stayed in my weekly rotation because I love what it does for my hair! When I have my hair highlighted (so always) it tends to pull reds and golds. Because of this it can start to look a little brassy. I use the Matrix So Silver once or twice a week to neutralize the brassiness. The directions on the bottle say to wear gloves (the shampoo is purple), but I don't ever do that and I haven't turned purple yet! ;-)


I added the It's a 10 Miracle Leave-In Product to my hair care routine this month. After showering I spray it on towel dried hair and comb through. I've noticed that my hair is softer and looks healthier since I started using it.

As far as makeup, I've pretty much stuck to most of what I mentioned in my January post (all linked below), but have added a few things back into the rotation. The Too Faced Chocolate Bar Eye Palette (the original one) is still one of my favorite eye shadow palettes. The colors are beautiful, have great payoff, and it smells like chocolate! What more could a girl want from her eyeshadow? I have also started using my YSL Gloss Volupte again (I have shade 20 Nude Carat). It's not at all sticky, just very glossy and wet feeling. I know, the description I just gave has you running out to buy it. I do have a gift with words, don't I? ;-) I've also started using my Urban Decay Perversion mascara again. It lengthens and adds volume to my lashes. Love it!


Those are my most used products for this month. Let me know if you decide to try any of them! What are your favorite hair and beauty products?

XOXO,
Friday, February 26, 2016

Friday Pinspiration {Couches and Sectionals}


Right now we have a leather couch that we got about five years ago from Rooms to Go. It's sad because right after we got it I kind of regretted the purchase. Our old couch was so comfortable, and it was perfect for naps. It isn't that our "new" couch isn't comfortable, it just isn't really one of those couches that you can really cozy into, if that makes sense.

I have been swooning over cozy living rooms on Pinterest and Instagram for the past several months, so I thought it would be fun to share some of my favorites here. For now that's all I can do: swoon, but sometime in the near future I plan on bringing one of these home! 

Makeup by Tiffany D

Lindevegen

I'm in love with the tufting on this couch, and it just looks cozy! In her blog Jennifer shared that this sofa is made by Bernhardt. After visiting the Bernhardt website I discovered that they do make a London Club Sectional, but it's MASSIVE, so I think if I did end up going with this I'd stick with the "smaller" (92 1/2") sofas as pictured here.

The Grace House

Decor Pad

I have seen the Ikea Ektorp Sectional all over Instagram and Pinterest. You definitely can't beat the price ($999), so if and when we decide to go couch shopping we'll definitely make a trip up to Frisco to visit Ikea.

The Glam Farmhouse

I saw this sectional at Haverty's when I was furniture shopping with a client and it was really comfy. 

Havertys

This is another sectional I pinned for a client. It looks like it would be perfect to curl up on, but the seat looks kind of deep so I'm not sure how good it would be for just sitting. I never really thought about couch depth until I was shopping with my mom last month. We found a beautiful couch that was super soft, but when you sat down you basically had to recline to be able to touch the back of the sofa (or sit with your feet hanging above the floor, which is awkward). My mother-in-law said it best when she said that they don't design a lot of furniture for short people, and I'm more of an average sized person! ;-)

Rooms to Go

It's fun to browse online, but I wouldn't ever buy a couch without actually sitting on it. It's one of the most used pieces of furniture in your house, so you want to make sure you think it's comfortable before buying it. 

Hopefully sometime soon I'll be sharing our new living room furniture, but for now I'll just be happy with what I have! 

Similar

XOXO,
Wednesday, February 24, 2016

Lemon Garlic Pasta with Spinach

Have you ever tried Barilla Veggie Pasta? I usually buy whole grain pasta, but yesterday when I was at the store I saw the veggie pasta and decided to try it. There is one full serving of vegetables in each serving of pasta - sounded good to me! I was cooking for one since Michael was out of town so I decided to make one of my favorite easy meals: Lemon Garlic Pasta with Spinach. Normally I'd make a full box of pasta and set some aside for Sophia and Carter to have with butter, but since I wasn't even sure if I would like the veggie pasta I made them macaroni & cheese. Now that I know how good it is I won't have to cook two different meals, and I'll be able to sneak them a serving of vegetables in their pasta - score!

Ingredients:
6 T EVOO
8 cloves garlic (minced)
Spinach
Barilla Veggie Thin Spaghetti
Lemon - zest and juice
Parmesan Cheese
Kosher Salt & Cracked Black Pepper


Boil water for pasta. Heat olive oil over medium-high heat. Add garlic and sauté about 30 seconds or until fragrant.


Add spinach and season with salt and pepper to taste. I added a large pinch of salt and about six turns of the pepper mill.


When pasta water boils, add a large pinch of salt. Don't add salt before the water boils because salt water takes longer to boil than fresh water.


Add pasta and cook according to package directions. Once pasta is finished, drain and reserve pasta water. Add pasta to spinach and season with salt and pepper. Add the zest and juice of one lemon. If needed, add reserved pasta water 1/4 cup at a time.


Toss and serve. Top with Parmesan cheese. Enjoy!


XOXO,
Friday, February 19, 2016

Our Home {Entry}

Welcome to our home!


In hindsight it probably would have made more sense to do this as my first post since it's the entrance into our house, but I didn't and I can't go back now, so I'll share it as the second home tour post.

When we decided to build this house, one of the things I loved about it was the entry. The door opens up to a beautiful "twisty" staircase (Carter's description) and you can see straight to the back of the house. Here is a shot of the entry in progress.


I can't resist posting a picture of these two cuties in the little alcove by the stairs. I can't believe how young they look!


Once we moved in I realized that while there are two windows above the front door and you can see straight to the back of the house, it was still pretty dark in there. It doesn't help that our door is solid wood. I absolutely love it, and kind of prefer that when people ring the doorbell they can't see in to know if I'm there or not (I don't know about you, but if Michael isn't home and I'm not expecting anyone, oftentimes I don't answer the door), but I'm kind of wishing that we'd chosen door with glass so it would let a little more light in. Eventually we may change it out, though we had to fight the builders for the rounded door so we'll see.

Back to entry decor....I had this bench from Home Goods sitting in the entry with a chalkboard hanging above it, and for the longest time the alcove by the stairs sat empty.


The above picture is actually from our old house, and seeing it reminds me I still have that family frame in a closet somewhere! 

Anyhow, the entry was already dark, so having a black bench with a black chalkboard above it didn't do much for the space. Enter white chalk paint and a new rug!


Looking at this photo now I realize that I never actually painted the inside of the bench under the baskets and you can totally see it. Oops! Guess I have a project to tackle next week! 

Once I had that part of the entry finished I decided it was time to tackle the alcove by the stairs. I enlisted my mom's help and we headed to the upscale furniture resale shops in the area. We saw a round table at the first store we went to, but it was listed at $199 and I wasn't sure I wanted to spend that much money on a table that would just sit in a corner. I don't know, maybe it was a good price, I just haven't bought enough furniture recently to have a good idea of the cost. We decided to keep looking, so we went to a few other resale shops, Home Goods, and Pier 1, but didn't find anything. This was late October and I planned on putting my Christmas tree in the alcove, so there wasn't a big rush. The table at the first store we went to was set to drop in price to $159 on December 8th, so I decided to hold off on making any purchases and hope the table was still there in December. If it was I knew it was meant to be, and if it wasn't I would just be incredibly disappointed (my first clue that it was the perfect table).

The day after Thanksgiving we decorated for Christmas. I realized quickly that I didn't actually want to put our Christmas tree in the alcove - the only time we'd see it was when we were in the front of the house. I wanted to be able to sit by the tree and enjoy the twinkling lights. :) Because the tree didn't go there I was very anxious to get that table! I am not a patient person when it comes to making purchases (if I decide I want something I need it now), but somehow I was able to wait until December 8th to go to the store. When I arrived there were two ladies there who were buying a couch that was next to the table and we also apparently considering the table (this from the lady at the checkout). After purchasing the table I went to Home Goods and Hobby Lobby and picked up a few things to put on the table. When I got home I immediately set it up and sent my mom this picture.


It fit pretty well, but still seemed to be missing something. We hung a mirror that I'd gotten at Hobby Lobby, but it still didn't look quite right, so I moved the chair out of our bedroom into the space. Perfect!


The finishing touch was this Joshua 24:15 sign from Petunia Fitzgerald Collections


I still want a little more light in the entry (the last pictures were taken with our front door open), so I'll eventually get a new chandelier for the foyer, but for now I'm happy. It's warm and welcoming, which is exactly the look I was going for!

I'll be back soon with another room reveal!

XOXO,
Wednesday, February 17, 2016

Dinner on Hand {Goat Cheese & Spinach Pasta with Lemon Garlic Shrimp and Burst Tomatoes}

Last night's dinner was all about what I had on hand. I literally went to the refrigerator and pulled out what I had. 


It turned out really well, so I decided to share!

For shrimp:
2 T EVOO
1 T lemon juice 
6 garlic cloves (minced) 
¼ tsp cumin 
¼ teaspoon red pepper flakes 
¼ teaspoon kosher salt 
¼ teaspoon black pepper 
1 pound large shrimp, shelled and deveined (I use frozen)
Preheat oven to 425 degrees. Mix all ingredients in a medium bowl. 


If using frozen shrimp, thaw in a colander under cool running water. Pour marinade over shrimp and set aside for 20 minutes. 

Cook shrimp at 425 degrees for 10-12 minutes or until shrimp are done.


Boil pasta water. Add pasta and cook according to package directions. Reserve pasta water. 
*Helpful hint: place colander on a bowl so when pasta water drains it catches in the bowl.


For pasta:
3 T EVOO
6 cloves garlic (minced)
Baby Spinach (5 oz.)
Cherub tomatoes (10.5 oz.)
1/2 cup sour cream (I used light)
Goat Cheese (I used Garlic Herb because that's what I had on hand)
Salt & Pepper to taste
Rotini Pasta
Reserved pasta water
Parmesan Reggiano Cheese
While shrimp marinates and pasta cooks, heat oil over medium-high heat. Add garlic and sauté just until you can smell it, about 30 seconds.


Add spinach. I added the entire package. It looks like a lot, but it will wilt down to nothing. Add a big pinch of kosher salt and fresh cracked black pepper.


Once spinach is cooked, add tomatoes. 


Lower heat to medium and let tomatoes cook while pasta finishes. The tomatoes will begin to soften and will burst when you gently push on them with your spoon. Add 1/2-3/4 cup pasta water, sour cream, and goat cheese (I had about half of a 4 oz. package left, so that's what I used).  Season with salt and pepper to taste.


Once the goat cheese is melted, lower the heat to simmer and cover. Sauce will thicken slightly. Add pasta and 1/3 cup Parmesan Reggiano.


To serve, plate pasta and top with shrimp. I had some parsley on hand, so I prettied it up with a garnish.


Enjoy!

XOXO,

Tuesday, February 16, 2016

Lemon Dijon Tilapia

I found this recipe on Pinterest for salmon and I decided to adapt it a little for tilapia. It's super easy and delicious (and in my opinion tastes much better with tilapia ~ tilapia is usually a thinner cut than salmon so it absorbs the flavored of the marinade much more, even when cooked from frozen).

Ingredients:

  • 4 tilapia filets (I use frozen)
  • 2-3 garlic cloves (minced)
  • 2 T fresh parsley (finely chopped)
  • 1/2 T Dijon mustard
  • 1/2 tsp salt
  • 1/8 tsp pepper
  • 2 T lemon juice
  • 1/8 cup EVOO 

Mix garlic, parsley, mustard, salt, pepper, lemon juice, and olive oil in a small bowl. 


Line a sheet pan with foil and brush marinade on both sides of tilapia filets. Top with lemon slices. 


Bake at 400 degrees for 14-18 minutes or until tilapia is opaque and flakes when cut. I cook mine from frozen so it takes a little longer. 


Serve with rice pilaf or couscous and your favorite vegetable for a healthy and delicious meal! Enjoy!

XOXO,
Monday, February 15, 2016

Our Home {Kitchen)

My plan was to do a home tour, but I've been changing things up a little, so I want to finish that before I do the full tour. For now I'll start with the kitchen! Here are a few in progress shots because those are always fun!


It makes sense to start here since it's one of my favorite rooms in the house! When we built this house we got to design our dream kitchen! It's not that I didn't love the kitchens we designed in our last two houses, but we were a little more limited in the choices that our builders offered, so I couldn't get everything I wanted. In this house we got it all: double oven, pot filler (not as awesome as I thought it would be, by the way ~ it's only cold water so the water takes FOREVER to boil!), beautiful granite, white cabinets with a coffee glaze, no farmhouse sink, but it will come eventually and I love it as is!

When you pick the standard granite, which we did for our bathrooms, you don't get to pick the slab, but we got to pick out the slabs for our kitchen because we upgraded a little (easy to do when the builder is offering 50% off upgrades). Here is the slab we chose for the island - the tape represents where they were going to cut and where we wanted the sink placed. The granite is called Alaska. I'm so glad we got to choose, because the newer Alaska slabs don't look anything like this. We had to  visit two or three warehouses to find slabs that resembled what we'd chosen in the design gallery.


Here is a picture of the kitchen right before we moved in.


I'm going to back up a little to explain why our kitchen counters stayed bare for the first 11 months we lived here. When we decided to sell our last house, my mom suggested I remove everything from the counters (toaster oven, coffee pot, etc) for a cleaner look. I even went so far as to throw out our toaster oven (in my defense, it was old and didn't work that well, so it's not like I threw away a perfectly good appliance)! Now when we want to make toast or Eggo waffles we just turn the oven to broil and throw the food in right away for one minute per side. It works great and there is no mess on our counters ~ try it, you'll never go back! I got used to the look, and was in love with my new counters and backsplash, so when we moved in I kept the minimalist look.

My desire to decorate actually started when we moved our entertainment center (actually a sideboard with a wine rack built in) out of the family room and into the kitchen nook. I added an EAT sign that I'd painted along with a decorative platter, but it looked pretty barren. That's about the time I discovered the #WWYDdecor hashtag on Instagram. I posted this picture and asked for advice.


Someone suggested I move the stuff down from the walls and layer it on the sideboard, but then I'd be left with empty walls with holes that I needed to fill and paint so that wasn't an option. Another hashtag I had seen on Instagram a lot was #TuesdayDecorParade which was all about tiered trays, so when someone suggested I get a tiered tray I knew it was meant to be! I picked up a wood and metal tray from World Market along with a cute little lavender nest and a succulent and brought them home. I had a collection of tea cups and saucers in my cabinet, so I added one along with the blue and white elephant we purchased in Amsterdam last year and it was finished! I also picked up a cute sign and framed chicken wire (I can't think of any other way to describe it, that's what it is) from Hobby Lobby and a decorative sphere and topiary at Home Goods. I love how it turned out! Now I just need the Magnolia Farms tray I ordered on sale from Magnolia Market to arrive (and for it to fit!) for the bottom shelf.


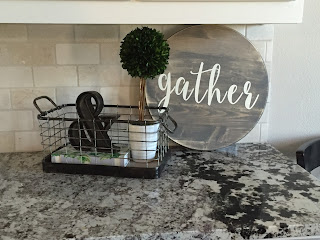
After I finished the nook I decided I needed to work on the rest of the kitchen. We do a lot of entertaining, but I've recently realized that I am severely lacking in serving pieces. Because of this I ordered a Lazy Susan from The Signature Swag. When it arrived I knew that it would be perfect on display, and when we are entertaining I have easy access to it! I used a metal basket and ampersand from Hobby Lobby, a topiary from Home Goods, and the family cookbook Michael's aunt and uncle gave us for our wedding to complete the vignette.


I just changed out our wooden kitchen utensil holder to a silver wine bucket I found while unpacking at my parent's new house this past weekend. They had four of them, so I decided they wouldn't miss one. :) I kind of love the look!


I already had the milk jug measuring cups from Anthropologie (mine is a little shorter because the 1/3 cup broke in our move) and our knife block on the other side of the counter, but I decided to add a mason jar cookie jar and vintage breadbox as well. When adding items to your kitchen counters, try to get things that can serve a double purpose - the bread box and cookie jar look adorable sitting on the counter, but they're also holding two loaves of bread and the chocolate chip cookies I baked with my niece yesterday.


Isn't the farmer's market pillow adorable? I ordered it from Peek Pillow Originals.


The island is still pretty empty other than our paper towel holder and soap dispenser. I had gotten a cake stand at Home Goods several months back, and it was just sitting in the cabinet, so I decided to put our soap on "display" to pretty it up a little.


I made the Bakery sign and added the Fresh Baked Pies sign from World Market to the counter in our Butler's Pantry where I keep my canisters and Kitchenaid mixer. Again, use items that can serve a double purpose (I'm obviously not talking about the signs here) ~ the canisters hold flour, sugar, and candy (yes, you read that right), and the ceramic egg crate is perfect when I get fresh eggs from my friend!


The bar counter in the Butler's Pantry was begging for something. At first I was going to do a coffee bar, but since I don't drink coffee unless it tastes like chocolate (Starbucks White Mocha - yum!) I decided that didn't make much sense. I love to make sparkling lemonade (use one can of frozen pink lemonade and sparkling water), so I searched Pinterest for a cute printable and created a mini lemonade stand. 


Here is a view of the kitchen from the Butler's Pantry. We used to have a runner that matched the rug in the nook, but it started to get dirty so I replaced it with a bio-foam rug from Bed Bath & Beyond. So much comfier to stand on when I'm washing dishes!


Here are a couple shots of the kitchen from the family room. You may have noticed that I rearranged a few things after I took these pictures (I think I'll forever be doing that). :)


I hope you enjoyed my kitchen tour! I tried to link either identical or similar items if you're looking to add anything to your kitchen!

I'll be back soon to share another room! 

XOXO,