Showing posts with label Food. Show all posts
Friday, March 26, 2021

Avocado Egg Salad

It's Lent, which means that on Fridays we don't eat meat. We're also doing a Macro Bell Curve in FASTer Way VIP, and Fridays are now low carb days. This wouldn't be that big of an issue if low carb just meant don't eat a lot of carbs, but when you eat low carb you need to make up those calories with fat. My go to protein/fat on low carb days is usually Aubrey at Kale Kouture's Dill Chicken Salad (if you like chicken salad, head to her blog and search for the recipe - it does not disappoint), but since I can't eat meat on Fridays right now, I needed to come up with something different. I decided to use most of the same ingredients and try to make egg salad with them. 


Ingredients:

  • 1 whole egg
  • 3 egg whites*
  • 1 T celery
  • 1/2 avocado (usually about 50 grams)**
  • 1 T Hellmann's Light Mayo
  • 1 tsp Plain Nonfat Greek Yogurt
  • 1/4 tsp Dill Weed
  • Salt & Pepper to taste
*You could definitely use the yolks of all of the eggs if you want to, but I was originally thinking that I'd be making this on a Regular Macro day (most of the time Fridays are Regular Macro), which means less fat, so I decided to use just the egg whites (high protein, almost no fat). When I realized that it was a Low Carb day I decided to stick with my original plan and just use the whites, but to add in avocado for added fat. Plus, I think it tastes better this way.

**If you wanted to make this lower in fat then you could omit the avocado. You might need to increase the mayo/yogurt just so it's not too dry, though.

Directions:


Hard boil the eggs. I do have one of those fancy Dash Egg Cookers (fancy because of how it cooks them, not because of the price - it's actually less than $20),  and I use it when I think about it, but most of the time I still revert back to boiling them on the stove. Once they're cooked, immediately transfer them to an ice bath. This helps stop the cooking process (I think) and it makes them easier to peel (the real reason I do it, but throwing out the "it stops the cooking process" just makes me sound more knowledgeable in the kitchen.😉


While the eggs cook, slice the avocado and discard the pit. This avocado knife is a great all-in-one tool, but you can definitely get by without it. Use slice up half of the avocado and put it in a bowl.


Peel the eggs and slice one of the eggs (yolk and white) into the bowl with the avocado. Cut the remaining eggs in half and separate the whites and yolks. Slice the whites and add them to the bowl.


Add remaining ingredients and mix. Season with salt and pepper to taste.


On a Low Carb day I eat it on Trader Joe's Gluten Free Crispbread, but you could totally have it on bread as well. Enjoy!

Friday, March 19, 2021

Chocolate Chia Seed Pudding


On the list of foods that I never thought I'd try: Chia Seed Pudding. I'd seen it mentioned several times in FASTer Way Meal Plans, but I'd never had even had chia seeds before, so I was pretty sure Chia Seed Pudding would be out of my wheelhouse. Then we did a smoothie reset last summer in FASTer Way VIP, and a few of the smoothies had chia seeds as an ingredient. They're a good source of fat and protein, and only have 4 carbs (0 net carbs on low carb days), so I decided to give Chia Pudding a try. I scoured the internet and looked at a lot of different recipes, and finally settled on a combination of what I'd found. I started out making Vanilla Chia Seed Pudding, but then I ran out of my vanilla protein powder, so I switched to chocolate and have been making it that way ever since. Chia Seeds have no flavor, so the pudding will taste like whatever you add in (I have a snickerdoodle protein powder that I might try next).


Ingredients:


4 T Chia Seeds
3/4 cup Unsweetened Almond Milk
1 scoop Chocolate Protein Powder (I like the I Heart Macros Chocolate Milkshake Protein Isolate)
1/2 T Pure Organic Maple Syrup

Directions:


Whisk all ingredients together and let it sit for five minutes. Whisk again and refrigerate 2-3 hours or overnight. I've heard several people say that they struggle with the chia seeds clumping together, but double whisking seems to eliminate this problem. Top with fruit and nut butter (I used 1/4 mashed raspberries and 1.5-2 tsp peanut butter) and enjoy! 


Saturday, October 19, 2019

Three Ingredient Pumpkin Chocolate Chip Muffins

Breakfast in our house used to be so easy - Carter ALWAYs wanted a smoothie and Sophia ate mini glazed donuts. Unfortunately about a month ago Carter decided he wasn't a fan of having a smoothie for breakfast, and around the same time it started to become almost impossible to get Sophia's donuts - our local grocery store was either out of them or they were expired/about to expire. Thankfully it's fall, and that's the time when everyone wants pumpkin everything! When I say everyone there, I'm actually talking about the world at large, not inside my house.  My kids are two of the pickiest eaters - for Carter that mainly applies to breakfast foods, but for Sophia, it applies to all meals. They might not eat pumpkin everything, but they do eat these muffins, so they're pretty much a fall staple in our house (and might become a winter, spring, and summer staple - as long as they're eating them I'll be making them).

To make these muffins you literally only need three ingredients, and if you or your kids aren't into chocolate then you only need two.

Pumpkin Chocolate Chip Muffins
Yield: 24 muffins


Ingredients:
Yellow Cake Mix
Pumpkin Pie Filling
Chocolate Chips (optional)

Directions:

  • Mix the yellow cake mix and pumpkin pie filling together.


  • Fold in chocolate chips. I usually use about half a bag.

  • Scoop into muffin tins and bake at 350 degrees for 20-25 minutes or until a toothpick comes out clean (for me that's at 22 minutes). 


  • They turn out moist and delicious, and even with the chocolate chips are fairly low calorie. I'm kind of curious to try them using chocolate cake mix or a different kind of chips, but haven't branched out yet. If it's not broke, don't fix it. You know?


If you try them, drop a comment below and tell me what you think!
Wednesday, October 19, 2016

Crock Pot Brisket


Have you ever fallen in love with a recipe you found on Pinterest and then discovered that it had been deleted? Well, that's what happened to me the last time I went to make this crock pot brisket. I clicked on the Pinterest link and this was what I got instead of the recipe:


I was so upset! This recipe has become a favorite in our house and I never bothered to write it down because I knew it would always be there when I needed it. WRONG! Luckily it's a pretty simple recipe and I could pretty much do it in my sleep, so it wasn't hard for me to recreate, but there's just something about having a recipe in front of me that just makes it better. Ya feel me? ;) This is literally the easiest recipe, but I still feel better having it written down, so here you go!

Crock Pot Brisket

Ingredients: 

2-3 lb. brisket
1 bottle of beer (dark beer is best, but use whatever you have on hand/your favorite)
yellow onion
flour (used as a thickener)


Slice the onion and throw it in the bottom of your crockpot.


Place the brisket, fat side up, on top of the sliced onion.


Pour the beer over the meat and onion. The last time I made this I used Saint Arnold Lawnmower because that's what we had available, but dark beer is best.


Follow the directions on the Better Than Bouillon to create a broth. I usually use about two cups of boiling water to two teaspoons of BTB and add 1-2 tablespoons of flour as a thickener.


Pour the broth into crockpot and cook on low for 8 hours.


After 8 hours take two forks and shred the brisket.


Lately we have been having it on Hawaiian Rolls with swiss cheese and horseradish mayo, but I've also made brisket tacos with it. It is delicious however you serve it! Enjoy!

XOXO,
Monday, October 17, 2016

Peanut Butter Bottoms


One of my favorite treats my mom made when I was growing up was a dessert bar called Peanut Butter Bottoms. It is really easy to make, and tastes so yummy, so last week Sophia & Carter helped me make them. I love when I can get them in the kitchen, and I'm hoping that the more they help me cook, the more they'll be willing to try new things. Of course, getting them to try Peanut Butter Bottoms, or any sweet treat, isn't really a challenge. 

Mom advice: when your kids start eating solid foods DON'T make them something different (you know, chicken nuggets, mac and cheese, hot dogs, buttered pasta) than you at dinner. Feed them the same thing you're eating. Otherwise you'll have a power struggle every time you try to get them to eat something new/different.

Peanut Butter Bottoms

 Ingredients:

1/2 cup white sugar
1/2 cup white Karo syrup
3/4 cup peanut butter
1 tsp. vanilla
3 cups Special K
6 oz. chocolate chips
6 oz. butterscotch chips

Directions:

Mix together sugar and Karo syrup and bring to a boil.


Once the mixture comes to a boil, add the peanut butter and vanilla. Tip: measure out the peanut butter ahead of time.


Cream together and add three cups of Special K.


Once the cereal is coated, spread into a buttered cake pan.


Melt the chips and spread over cereal mixture.


Allow the chocolate to cool and harden. Cut into squares and enjoy!


XOXO,
Tuesday, September 13, 2016

Make Packing School Lunches Easy

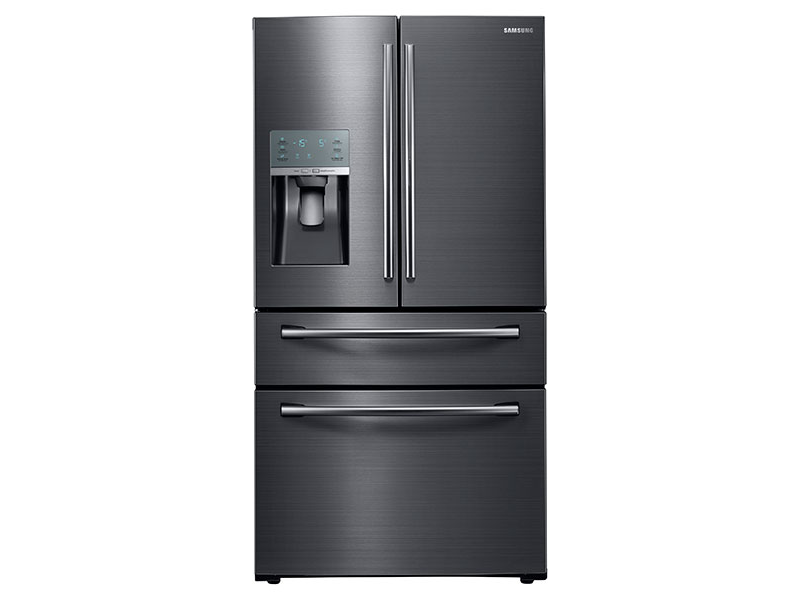
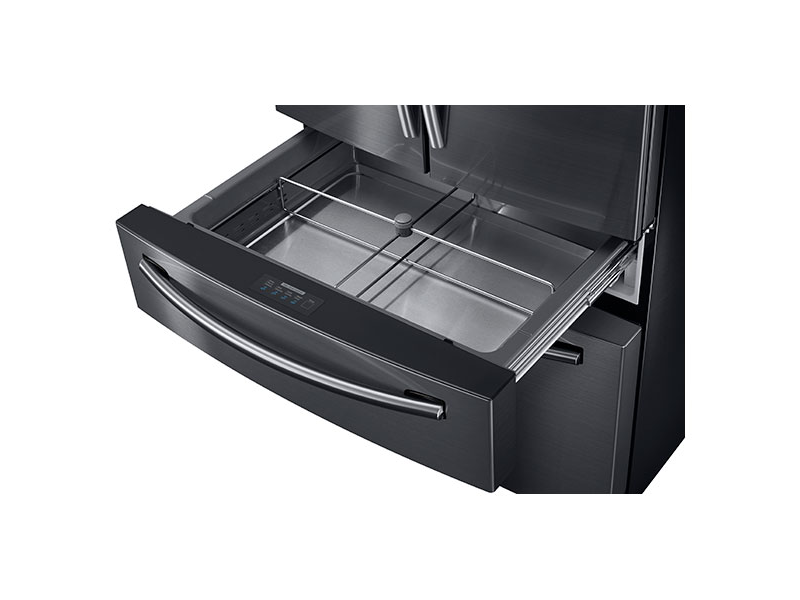
We got a new Samsung French Door Refrigerator over the summer, and I was so excited about the snack drawer.  It would be perfect for Sophia and Carter's snacks and juice boxes! 
And then we got it home and my excitement faded a little. No matter what I put in there, the divider always ended up moving and things would shift around. It just wasn't as handy as I was expecting it to be. 
I kept thinking that there must be a way to lock the divider, but never figured it out, so I decided to improvise and add these Fridge Binz that I'd purchased when we got the fridge. Problem solved! 
I now love the fridge and cannot recommend it enough! I love having the full width for our refrigerated items, and it's so much easier to keep our freezer organized! I actually know what I have in there now! LOL!

On to what this post was really supposed to be about - school lunches! Prior to the first day of school, we went grocery shopping and as soon as we got home we got to work. We got sliced apples and grapes, and petite carrots. We portioned them out into individual snack bags. For the apples I added some lemon juice to each bag to keep them from turning brown (this worked for about three days and on day four Sophia & Carter complained that they tasted weird). They fit perfectly in the divided fridge bin! 


We also bought string cheese, cheese sticks, snacking mozzarella, and Gogurt, which also fit well in the bins. We had some mini bottles of Ozarka water, so I put those in the front section of the drawer along with Horizon Chocolate Milk (these didn't go in lunches, they just fit well in the drawer).


The lighting is kind of weird, but here is the entire drawer after we filled it.


We also picked up some prepackaged snacks for their lunches, and portioned out the large box of Goldfish into individual snack bags. I organized them in these baskets from The Container Store.


I threw miscellaneous items into these elfa Drawers


We are now in week four of the school year and it is so easy to pack lunches in the morning! Confession: Sophia & Carter LOVE the Smucker's Hazelnut Uncrustables, so those work as the sandwich portion of their lunches (probably not the healthiest, but a definite time saver, and the fruits and veggies cancel it out, right?).

Hopefully my newly organized fridge and pantry inspires you to do a little organizing yourself! It certainly has made our mornings easier!


XOXO,